
This is the first installment of a series of posts about Hammerspoon, a staggeringly powerful automation utility which gives you an amazing degree of control over your Mac, allowing you to automate and control almost anything. In the word of Hammerspoon’s motto: Making the runtime, funtime.
Why Hammerspoon?#
Hammerspoon is a Mac application that allows you to achieve an unprecedented level of control over your Mac. Hammerspoon enables interaction with the system at multiple layers–from low-level file system or network access, mouse or keyboard event capture and generation, all the way to manipulating applications or windows, processing URLs and drawing on the screen. It also allows interfacing with AppleScript, Unix commands and scripts, and other applications. Hammerspoon configuration is written in Lua, a popular embedded programming language.
Using Hammerspoon, you can replace many stand-alone Mac utilities for controlling or customizing specific aspects of your Mac (the kind that tends to overcrowd the menubar). For example, the following are doable using Hammerspoon (these are all things I do with it on my machine - each paragraph links to the corresponding sections in my config file):
- Add missing or more convenient keyboard shortcuts to applications, even for complex multi-step actions. For example: automated tagging and filing in Evernote, mail/note archival in Mail, Outlook and Evernote, filing items from multiple applications to OmniFocus using consistent keyboard shortcuts, or muting/unmuting a conversation in Skype.
- Open URLs in different browsers based on regular expression patterns. When combined with Site-specific Browsers (I use Epichrome), this allows for highly flexible management of bookmarks, plugins and search configurations.
- Replace Spotlight, Lacona and other launchers with a fully configurable, extensible launcher, which allows not only to open applications, files and bookmarks, but to trigger arbitrary Lua functions.
- Manipulate windows using keyboard shortcuts to resize, move and arrange them.
- Set up actions to happen automatically when switching between WiFi networks–for example for reconfiguring proxies in some applications.
- Keyboard-triggered translation of selected text between arbitrary human languages.
- Keep a configurable and persistent clipboard history.
- Automatically pause audio playback when headphones are unplugged.
Hammerspoon is the most powerful Mac automation utility I have ever used. If you are a programmer, it can make using your Mac vastly more fun and productive.
How does Hammerspoon work?#
Hammerspoon acts as a thin layer between the operating system and a Lua-based configuration language. It includes extensions for querying and controlling many aspects of the system. Some of the lower-level extensions are written in Objective-C, but all of them expose a Lua API, and it is trivial to write your own extensions or modules to extend its functionality.
From the Hammerspoon configuration you can also execute external commands, run AppleScript or JavaScript code using the OSA scripting framework, establish network connections and even run network servers; you can capture and generate keyboard events, detect network changes, USB or audio devices being plugged in or out, changes in screen or keyboard language configuration; you can draw directly on the screen to display whatever you want; and many other things. Take a quick look at the Hammerspoon API index page to get a feeling of its extensive capabilities. And that is only the libraries that are built into Hammerspoon. There is an extensive and growing collection of Spoons, modules written in pure Lua that provide additional functionality and integration. And of course, the configuration is simply Lua code, so you can write your own code to do whatever you want.
Interested? Let’s get started!
Installing Hammerspoon#
Hammerspoon is a regular Mac application. To install it by hand, you just need to download it from https://github.com/Hammerspoon/hammerspoon/releases/latest, unzip the downloaded file and drag it to your /Applications folder (or anywhere else you want).
If you are automation-minded like me, you probably use Homebrew and its plugin Cask to manage your applications. In this case, you can use Cask to install Hammerspoon:
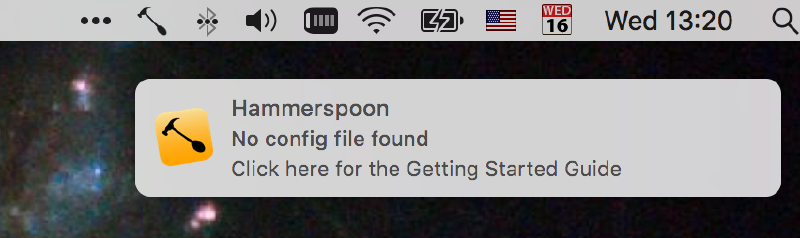
brew cask install hammerspoonWhen you run Hammerspoon for the first time, you will see its icon appear in the menubar, and a notification telling you that it couldn’t find a configuration file. Let’s fix that!
Your first Hammerspoon configuration#
Let us start with a few simple examples. As tradition mandates, we will start with a “Hello World” example. Open $HOME/.hammerspoon/init.lua (Hammerspoon will create the directory upon first startup, but you need to create the file) in your favorite editor, and type the following:
hs.hotkey.bindSpec({ { "ctrl", "cmd", "alt" }, "h" },
function()
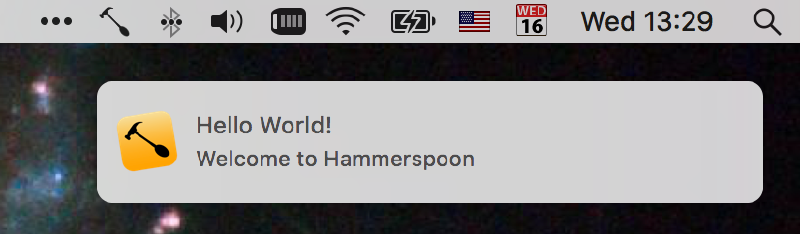
hs.notify.show("Hello World!", "Welcome to Hammerspoon", "")
end
)Save the file, and from the Hammerspoon icon in the menubar, select “Reload config”. Apparently nothing will happen, but if you then press Ctrl-⌘-Alt-h on your keyboard, you will see a notification on your screen welcoming you to the world of Hammerspoon.
Although it should be fairly self-explanatory, let us dissect this example to give you a clearer understanding of its components:
All Hammerspoon built-in extensions start with
hs.In this case,hs.hotkeyis the extension that handles keyboard bindings. It allows us to easily define which functions will be called in response to different keyboard combinations. You can even differentiate between the keys being pressed, released or held down if you need to. The other extension used in this example ishs.notify, which allows us to interact with the macOS Notification Center to display, react and interact with notifications.Within
hs.hotkey, thehs.hotkey.bindSpecfunction allows you to bind a function to a pressed key. Its first argument is a key specification which consists of a list (Lua lists and table literals are represented using curly braces) with two elements: a list of the key modifiers, and the key itself. In this example,{ { "ctrl", "cmd", "alt" }, "h" }represents pressing Ctrl-⌘-Alt-h.The second argument to
bindSpecis the function to call when the key is pressed. Here we are defining an inline anonymous function usingfunction() ... end.The callback function uses
hs.notify.showto display the message. Take a quick look at thehs.notifydocumentation to get an idea of its extensive capabilities, including configuration of all aspects of a notification’s appearance and buttons, and the functions to call upon different user actions.
Try changing the configuration to display a different message or use a different key. After every change, you need to instruct Hammerspoon to reload its configuration, which you can do through its menubar item.
Debugging tools and the Hammerspoon console#
As you start modifying your configuration, errors will happen, as they always do when coding. To help in development and debugging, Hammerspoon offers a console window where you can see any errors and messages printed by your Lua code as it executes, and also type code to be evaluated. It is a very useful tool while developing your Hammerspoon configuration.
To invoke the console, you normally choose “Console…” from the Hammerspoon menubar item. However, this is such a common operation, that you might find it useful to also set a key combination for showing the console. Most of Hammerspoon’s internal functionality is also accessible through its API. In this case, looking at the documentation for the main hs module reveals that there is an hs.toggleConsole function. Using the knowledge you have acquired so far, you can easily configure a hotkey for opening and hiding the console:
hs.hotkey.bindSpec({ { "ctrl", "cmd", "alt" }, "y" }, hs.toggleConsole)Once you reload your configuration, you should be able to use Ctrl-⌘-Alt-y to open and close the console. Any Lua code you type in the Console will be evaluated in the main Hammerspoon context, so you can add to your configuration directly from there. This is a good way to incrementally develop your code before committing it to the init.lua file.
You may have noticed by now another common operation while developing Hammerspoon code: reloading the configuration, which you normally have to do from the Hammerspoon menu. So why not set up a hotkey to do that as well? Again, the hs module comes to our help with the hs.reload method:
hs.hotkey.bindSpec({ { "ctrl", "cmd", "alt" }, "r" }, hs.reload)Another useful development tool is the hs command, which you can run from your terminal to get a Hammerspoon console. To install it, you can use the hs.ipc".cliInstall function, which you can just add to your init.lua file to check and install the command every time Hammerspoon runs.
hs.ipc.cliInstall creates symlinks under /usr/local/ to the hs command and its manual page file, located inside the Hammerspoon application bundle. Under some circumstances (particularly if you build Hammerspoon from source, or if you install different versions of it), you may end up with broken symlinks. If the hs command stops working and hs.ipc.cliInstall() doesn’t fix it, look for broken symlinks left behind from old versions of Hammerspoon. Remove them and things should work again.Now you have all the tools for developing your Hammerspoon configuration. In the next installment we will look at how you can save yourself a lot of coding by using pre-made modules. In the meantime, feel free to look through my Hammerspoon configuration file for ideas, and please let me know your thoughts in the comments!